

Key takeaways
- Clearances differ by maker: Husqvarna gives 35 cm (about 14 in) from obstacles taller than 3.5 cm, while Worx gives smaller figures such as 26 cm from a step. Always follow your own manual.
- Peg roughly every 70 cm (about 27 in) on level ground for Husqvarna-style layouts, and closer on corners, curves and slopes.
- A kit with 50 pegs does not cover a full lawn loop; count your pegs before you start.
- Most boundary wire failures are couplers, cuts from edgers or spades, and loose pegs, not the wire itself.
- Test the loop with the mower and keep the wire above ground for two to four weeks before burying any of it.
To install a robot mower boundary wire, plan the loop on paper, set the charging station on level ground, then lay one continuous loop around the lawn and around every island, holding it to the grass with pegs and joining any cut ends with the maker’s waterproof coupler. Keep the wire the distance your manual specifies from edges and obstacles, run it above ground for the first few weeks to confirm the layout works, and only then let it settle into the turf or bury it.
Our top picks


As an Amazon Associate we earn from qualifying purchases at no extra cost to you.
Key takeaways
- Clearances differ by maker: Husqvarna gives 35 cm (about 14 in) from obstacles taller than 3.5 cm, while Worx gives smaller figures such as 26 cm from a step. Always follow your own manual.
- Peg roughly every 70 cm (about 27 in) on level ground for Husqvarna-style layouts, and closer on corners, curves and slopes.
- A kit with 50 pegs does not cover a full lawn loop; count your pegs before you start.
- Most boundary wire failures are couplers, cuts from edgers or spades, and loose pegs, not the wire itself.
- Test the loop with the mower and keep the wire above ground for two to four weeks before burying any of it.
What you need before you start
A boundary wire install is simple work, but doing it with the wrong quantities is the main reason people have to stop and re-order. Gather the following before you cut anything:
- A boundary wire in the length your lawn needs (plus a margin).
- Pegs or stakes: plan on one per 27 to 36 inches of straight run, plus extra on curves.
- Waterproof couplers (connectors), supplied by the maker or from a matching kit.
- The charging station and its power supply, with an outdoor-rated outlet nearby.
- A rubber mallet, wire cutters, pliers and a measuring tape, or the distance gauge that came with the mower.
- Marking paint or a garden hose to lay out the route first.
Step 1: Measure the lawn and work out how much wire you need
Walk the edge of the lawn and measure its perimeter. For a rectangle, add twice the length and twice the width. Then add the loop around each island (flower beds, trees, ponds), and the run from the charging station to the lawn edge and back.
| Lawn | Perimeter | Wire with 12% margin | Pegs at 27 in spacing | Pegs at 36 in spacing |
|---|---|---|---|---|
| 60 ft by 40 ft rectangle | 200 ft | 224 ft | about 100 | about 75 |
| 100 ft by 60 ft rectangle | 320 ft | 358 ft | about 160 | about 120 |
| Quarter-acre square (about 104 ft sides) | 418 ft | 468 ft | about 210 | about 160 |
A 150 m (492 ft) kit therefore covers a quarter-acre square with room for a couple of islands, but the 50 pegs that often ship in such kits cover only a fraction of that loop. Order a separate pack of stakes. Add more wire for a long guide wire, a distant charging station, or a lot of islands.
Step 2: Place the charging station first
The station is the fixed point of the whole system, so position it before the wire. Put it on the flattest ground you have, in a spot with a straight, clear approach of a few feet so the mower can dock without a sharp turn. Keep it out of standing water and out of direct, full-day sun if the maker advises shade. It should sit at the edge of the lawn with the wire loop passing through the station connectors. Check your manual for the exact orientation of the loop connections.
Step 3: Lay out the route and mark the clearances
Lay a garden hose along the planned route, or spray small paint dots, so you can see the loop before committing. The clearance from edges is what stops the mower driving over a drop or into a wall, so measure it carefully. Husqvarna’s installation guidance, for example, uses these approximate figures:
| Edge or obstacle | Husqvarna guidance | Worx Landroid guidance |
|---|---|---|
| Wall or object taller than 3.5 cm | 35 cm (about 14 in) | Check the Worx manual for your model |
| Low flower bed edge, 1 to 3.5 cm high | 30 cm (about 12 in) | Check the Worx manual for your model |
| Path or surface flush with the lawn (under 1 cm) | 10 cm (about 4 in) | 10 cm (about 4 in) |
| Step or drop | Follow the manual | 26 cm (about 10 in) |
| Swimming pool | Follow the manual | At least 30 cm (about 12 in), more is safer |
| Neighbor’s robot mower wire | Keep a gap | At least 1 m (about 39 in) |
The numbers differ because each mower has a different body and sensor position. Treat these as examples and use the distance gauge or the exact values in your own manual. For a pond or a drop-off, add extra clearance: the mower should never be able to reach the edge.
Step 4: Peg the wire down along the edge
- Start at the charging station and leave a few feet of spare wire for connection.
- Push a peg through the loop of wire every 70 cm (about 27 in) on level ground, as Husqvarna’s guide suggests. Some guides use 30 to 45 cm on straight runs.
- Place pegs closer on corners, curves and slopes, where the wire tends to lift.
- Keep the wire flat and taut but not stretched; a kink can break the conductor later.
- Maintain the clearance from the edge as you go, checking with the gauge every few feet.
- Do not cross the wire over itself unless the manual says so, and avoid laying it next to another loop or a power cable.
Pegging on a slope is the one place to be generous. A boundary wire that lifts on a bank can be cut by the mower blade or pulled by a foot.
Step 5: Wrap islands and leave passages wide enough
Anything inside the lawn that the mower must avoid, such as a flower bed or a tree with exposed roots, gets its own island. To make an island, run the wire to the object, circle it at the right clearance, then return along the same path with the two runs touching each other. Pegs along a double run hold both wires together. The doubled run cancels the signal, so the mower does not see it.
If a narrow passage links two parts of the lawn, check the manual for the minimum width. The Husqvarna guide cites at least 60 cm (about 24 in) between the wires on either side of a passage that has a guide wire, but other mowers differ. Plan wider passages if you can.
Step 6: Connect, join and trim
- Cut the wire square with clean cutters; the conductor should be undamaged.
- Join any two ends with the maker’s waterproof coupler: insert both ends fully and press the coupler closed with pliers until it clicks or seats.
- Do not twist and tape wires; moisture gets in and the signal fails.
- Connect the two ends to the charging station terminals, and trim surplus wire a short distance above the connectors as the manual instructs.
- Switch on the station and check the indicator. A steady loop signal means the circuit is closed.
Step 7: Test the mower, then adjust
Follow the manual’s commissioning routine: dock the mower, set it to run in a basic mode, and watch the first few passes. Pay attention to corners, the mower’s approach to edges, and the places where it turns near the wire. If it crosses the wire or hesitates, move the wire in small steps rather than redoing the loop. Walk the full loop after a few days to check for lifted pegs and exposed couplers.
Above ground or buried?
Many makers recommend leaving the wire on the surface for the first few weeks. The grass grows around it and holds it in place, and you can correct the layout without digging. Burying the wire is optional and is done to protect it from foot traffic, edgers and aerators. If you bury it, use a flat spade or a trenching tool and keep the depth shallow as the manual allows. Never bury a loop before you know it works.
| Approach | Pros | Cons |
|---|---|---|
| Above ground with pegs | Fast, easy to change, no digging | Can be cut by trimmers; pegs can lift in a freeze-thaw cycle |
| Buried 1 to 2 in | Protected from trimmers and walkers | Harder to locate and repair; digging is slow on a slope |
How to find a broken boundary wire
If the mower reports a wire or loop error and the station signal is off, the loop is open somewhere. Work through these steps in order:
- Check the obvious: couplers and station connections. Most failures happen at a joint.
- Think about recent work: edging, aerating, planting, or a spade dig near the wire.
- Disconnect the loop from the station and use a multimeter in continuity mode between the two ends; no reading means a break.
- Split the loop: expose the wire at the midpoint, join the two halves to test separately, and find which half is open. Repeat until the break is within a short distance.
- Cut out the damaged section and join the ends with a waterproof coupler, or splice in a short length of spare wire using two couplers.
- Test the station signal again and run the mower.
Some makers sell a locator or offer a built-in loop test, so check your manual before you start digging.
Gear that helps
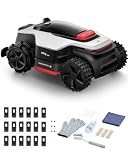
- FOTEEMO 150m/492ft Boundary Cable set: cable with 50 pegs, 10 cable connectors and 20 connection terminals, suits a quarter acre; add extra stakes.
- WORX WA0184 Landroid Boundary Wire Kit: a maker-matched kit for Landroid owners.
- Auto-Mow Wire Splice Repair Kit: 80 ft of boundary wire, 10 stakes and 5 connectors, aimed at repairs and short extensions.
- Kudoosen 100-piece 3.3 in lawn stake kit: plastic stakes for the extra pegs your loop will need.
Common mistakes to avoid
- Skipping the paper plan and discovering halfway that the wire is too short.
- Using too few pegs, then wondering why the wire lifts after the first mow.
- Laying the wire too close to an edge so the mower tips off a drop.
- Crossing the loop on itself in the wrong place.
- Burying the wire before the mower has run a few clean weeks.
Frequently Asked Questions
How do I install a robot mower boundary wire on my own?
Place the charging station, lay a hose to preview the route, peg the wire along the edge at the manual’s clearance, wrap islands with doubled runs, connect the ends to the station and test with the mower. Most lawns take a day or a weekend.
Can a robot mower boundary wire be above ground?
Yes. Many makers recommend leaving it on the surface for the first few weeks, then letting the grass grow over it. It will work above ground, though trimmers can cut it.
How far apart should the pegs be?
For Husqvarna-style layouts, about 70 cm (27 in) on level lawn. Other guides suggest 30 to 45 cm on straight runs, and all agree on closer spacing at corners and on slopes.
How much boundary wire do I need?
Measure the lawn perimeter, add the loops around each island and the station run, then add about 10 to 15% for corners and mistakes. A quarter-acre square needs roughly 420 ft before the margin.
How do I find a broken boundary wire?
Check the couplers first, then test the loop with a multimeter for continuity and split it in half to narrow down the fault. Repair with a waterproof coupler.
Can I use the boundary wire from a different brand?
Generic low-voltage wire often works, but connectors and peg shapes may differ. Check that the wire gauge and coupler meet your mower’s manual before you buy.
Last updated: November 2026.
More from Amazon
Programs that pair well with the guide above. Offers and eligibility are set by Amazon and may change.
Collect the home and kitchen items you want in one registry that guests can shop from.
Create a wedding registrySet up recurring deliveries of everyday items on eligible products. Terms and savings are set by Amazon.
Explore Subscribe & SaveFree shipping on eligible items, Prime Video and more. Eligible new members can start with a free trial.
Start a Prime free trialAudiobooks and podcasts to listen to on the go. Eligible new members can start with a free trial.
Try Audible freeAs an Amazon Associate we earn from qualifying purchases.




Write Your Review
No reviews yet. Be the first to share your experience!