

Key takeaways
- Reliable sanitizer: Cleaning removes soil; sanitizer reduces remaining microorganisms. Both steps matter.
- Hydrometer jar: A hydrometer may be included, but a narrow test jar is often not.
- Temperature control: Yeast performs more predictably around the temperature recommended on its packet.
- Extra tubing: Tubing becomes cloudy, scratched, or difficult to clean and is a routine replacement item.
- Stable packaging: Bottles must be pressure-safe if you carbonate. Ordinary decorative glass is not automatically suitable.
- Sweetening solution: Fermented cider is often dry. Sweetening with fermentable sugar can restart fermentation unless the cider is stabilized, pasteurized by an appropriate method, or kept refrigerated and consumed promptly.
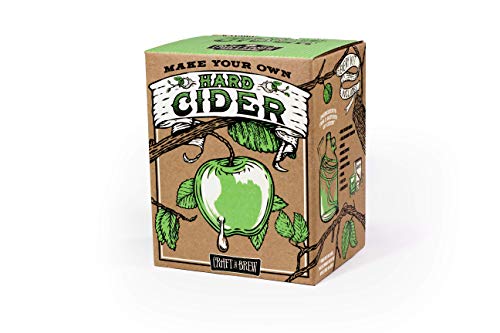
The best cider making kit for home brewing depends on your batch size: choose the Craft A Brew Hard Cider Kit or Northern Brewer 1-Gallon Craft Cider Making Kit for a small, beginner-friendly trial, and choose a 5- or 6-gallon equipment kit paired with a Mangrove Jack’s cider concentrate when you want lower cost per bottle and regular batches.
Our top picks


As an Amazon Associate we earn from qualifying purchases at no extra cost to you. Ratings are shown as listed on Amazon.
Quick picks by brewing situation
| Best for | Recommended kit type | Typical batch | Why it makes sense |
|---|---|---|---|
| First batch or limited storage | Craft A Brew Hard Cider Kit | 1 gallon | Compact fermenter, simple ingredient set, and manageable cleanup |
| Beginner wanting a more expandable setup | Northern Brewer 1-Gallon Craft Cider Making Kit | 1 gallon | Includes core fermentation equipment and leaves room to add bottling gear |
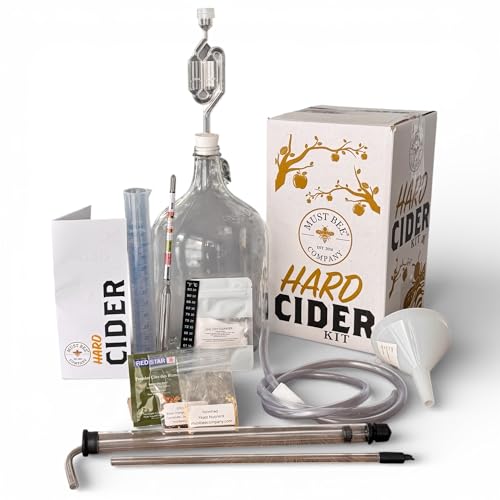
| Frequent brewing | 5- or 6-gallon equipment kit plus cider concentrate | 5–6 gallons | Better cost per bottle and compatible with standard carboys, buckets, and kegs |
| Recipe experimentation | Equipment-only starter kit | 1–6 gallons | Lets you select juice, yeast, tannins, spices, and sweetness independently |
What matters when comparing cider kits
Batch size and usable capacity
A “1-gallon” cider kit generally produces about 0.8–0.9 gallon of finished cider after sediment and transfer losses. That is roughly eight to ten 12-ounce servings. A 5-gallon setup may yield 45–50 12-ounce servings, depending on how much cider is left behind with the lees.
Small kits are easier to fit in a pantry or patio cabinet and make mistakes less expensive. Larger batches require a stable location with several inches of clearance above the vessel for an airlock. Do not fill a fermenter to its stated capacity: leave headspace for foam, especially during the first week.
Fermentation equipment
At minimum, look for a food-safe fermenter, lid or stopper, airlock, siphon, tubing, hydrometer, and sanitizer. A hydrometer is particularly valuable for cider because it shows whether fermentation has finished rather than relying on bubbles alone.
Some entry-level kits include only a narrow-mouth fermenting jar and basic airlock. Others add a bottling wand, caps, capper, and bottles. The latter costs more initially but prevents a second purchase when your cider is ready to package.
Ingredient quality
Ingredient packages differ more than their colorful boxes suggest. A kit may contain shelf-stable apple juice or concentrate, cider yeast, priming sugar, and flavoring. Concentrate is convenient and consistent, while fresh preservative-free juice can offer a more natural apple character but requires careful selection.
Check the juice label for preservatives. Potassium sorbate and sodium benzoate can inhibit yeast activity, making fermentation slow or unreliable. Vitamin C is commonly used as an antioxidant and is not the same problem. Cider yeast generally produces a drier, cleaner result than ordinary bread yeast.
Head-to-head: one-gallon kits versus larger equipment kits
| Feature | 1-gallon packaged kit | 5–6-gallon equipment setup |
|---|---|---|
| Typical fermenter material | Glass or PET plastic | Food-grade plastic bucket, PET, or glass carboy |
| Finished cider | 0.8–0.9 gallon | 4.5–5.5 gallons |
| Approximate 12-ounce servings | 8–10 | 48–58 |
| Typical fermentation footprint | About 9–12 inches wide and 14–18 inches tall | About 12–18 inches wide and 20–30 inches tall |
| Typical equipment cost | $45–$90, before optional extras | $90–$180, before juice or concentrate |
| Typical cider ingredient cost | $15–$30 per batch | $35–$75 per batch |
| Best advantage | Low commitment and easy experimentation | Lower equipment cost per serving and more consistent supply |
These are practical market ranges rather than fixed prices. Bottles, shipping, local juice costs, and seasonal availability can change the total substantially.
Recommended kit paths for beginners
Craft A Brew Hard Cider Kit: simplest small-batch route
This type of kit is a good match for someone who wants a contained introduction rather than a permanent brewing station. The usual one-gallon format keeps ingredient waste modest, and the equipment is sized for a kitchen shelf or protected outdoor storage area.
Its limitation is expansion. A small fermenter, short siphon, and basic packaging equipment do not automatically transfer to a 5-gallon workflow. Before buying, verify whether bottles, caps, a capper, hydrometer, and sanitizer are included or sold separately.
Northern Brewer 1-Gallon Craft Cider Making Kit: better foundation for learning
Northern Brewer’s one-gallon cider format is suited to beginners who want to learn the complete process—fermentation, gravity readings, transfer, and bottling—without committing to a full-size setup. The main advantage is the broader home-brewing ecosystem: replacement tubing, airlocks, hydrometers, and larger vessels are easy to find as your process develops.
Expect to purchase additional sanitizer or packaging supplies if the particular bundle does not include them. Confirm the ingredient version as well; a cider kit can contain juice, concentrate, yeast, or a recipe-oriented package depending on the listing.
5- or 6-gallon equipment kit with Mangrove Jack’s cider concentrate: best for regular batches
Mangrove Jack’s produces cider concentrates in larger formats, including styles such as apple, pear, and fruit variations. These products are ingredients rather than complete brewing systems, so pair one with a fermenter kit containing an airlock, hydrometer, siphon, and bottling equipment.
This route is less convenient for a one-time experiment but offers better control. You can choose a different yeast, add measured tannin or acid, ferment dry, or split a batch for different flavor additions. A 6-gallon concentrate also requires a vessel large enough to leave fermentation headspace; a nominal 6-gallon fermenter is often too full for a 6-gallon recipe.
What is usually missing from inexpensive kits
- Reliable sanitizer: Cleaning removes soil; sanitizer reduces remaining microorganisms. Both steps matter.
- Hydrometer jar: A hydrometer may be included, but a narrow test jar is often not.
- Temperature control: Yeast performs more predictably around the temperature recommended on its packet.
- Extra tubing: Tubing becomes cloudy, scratched, or difficult to clean and is a routine replacement item.
- Stable packaging: Bottles must be pressure-safe if you carbonate. Ordinary decorative glass is not automatically suitable.
- Sweetening solution: Fermented cider is often dry. Sweetening with fermentable sugar can restart fermentation unless the cider is stabilized, pasteurized by an appropriate method, or kept refrigerated and consumed promptly.
A beginner-friendly setup and maintenance sequence
- Clean every item that contacts cider. Remove juice residue from the fermenter, lid, airlock, tubing, and hydrometer jar.
- Sanitize immediately before use. Follow the sanitizer’s contact-time instructions rather than rinsing automatically.
- Measure the original gravity. This gives you a baseline for estimating alcohol and confirming fermentation progress.
- Pitch the correct yeast. Follow the packet temperature range; very cold or hot juice can delay or damage fermentation.
- Ferment with an airlock installed. Store the vessel away from direct sun and large temperature swings.
- Use gravity readings to confirm completion. Two matching readings several days apart are more useful than counting airlock bubbles.
- Transfer gently if clearing is desired. Avoid splashing, which can introduce oxygen after fermentation.
- Package only when fermentation is complete. Bottling too early can create excessive pressure.
Wash equipment soon after use. Dried cider sediment is harder to remove and encourages scratching when scrubbed aggressively. Replace soft tubing when it develops a persistent smell, cloudiness, cracks, or visible deposits. Plastic fermenters also wear from repeated abrasion; a deep scratch is a reason to retire the vessel rather than polish it away.
Worked cost comparison
Suppose a $70 one-gallon kit and $20 ingredient refill produce nine 12-ounce servings. The first batch costs about $10 per serving before shipping, but a second batch using only a $20 refill costs about $2.22 per serving, assuming the equipment remains usable.
A $140 larger equipment setup plus $55 of cider concentrate produces 50 servings. The first batch costs about $3.90 per serving; later batches cost about $1.10 per serving if the same equipment is reused. The larger setup wins financially only if you will make enough cider to use its capacity and have suitable storage for the fermenter and bottles.
Final buying advice
Choose a one-gallon kit if you value compact storage, low-risk experimentation, and a short learning curve. Select a larger equipment kit if you already know you enjoy cider, want repeatable batches, or plan to carbonate and share bottles. Whichever route you choose, prioritize a hydrometer, proper sanitizer, food-safe fermentation equipment, and clear instructions over decorative extras. Those four details have more influence on a successful first batch than the shape of the box or the number of accessories included.

Write Your Review
No reviews yet. Be the first to share your experience!