

Key takeaways
- Overflow hole: A port positioned at the maximum reservoir level allows excess water to escape. It should be visible and kept clear.
- Overflow pipe: A vertical tube can make the maximum water level easier to understand and may direct excess water away from the planter base.
- Open drainage gap: Some basic designs use a gap beneath the insert. These can work, but they may drain onto a balcony or patio surface.
- No overflow protection: Avoid these outdoors unless the planter is kept under cover and monitored closely.
The best self watering planters are the ones whose reservoir size, overflow design, material, and drainage controls match both your plants and how often you can refill them—not simply the planters with the largest water tank.
Our top picks

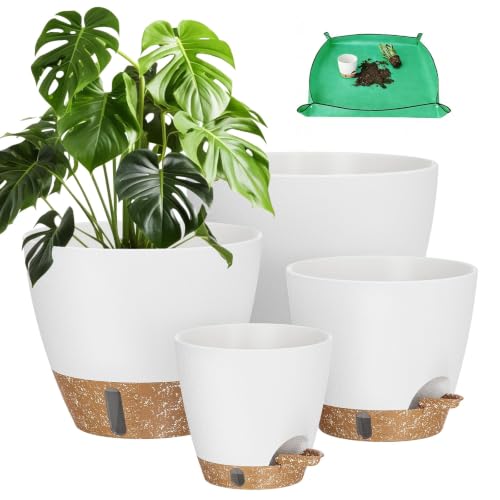


As an Amazon Associate we earn from qualifying purchases at no extra cost to you. Ratings are shown as listed on Amazon.
Best self-watering planters by situation
| Situation | Best planter type | Useful specifications | Why it fits |
|---|---|---|---|
| Small herbs or one houseplant | Wick-fed insert planter | 15–25 cm diameter; 0.5–1.5 L reservoir | Compact, inexpensive, and easy to monitor |
| Patio flowers or leafy annuals | Capillary planter with internal false bottom | 30–40 cm diameter; 2–5 L reservoir | Balances root space with several days of water storage |
| Large tropical plant or tomato | Deep reservoir planter with overflow port | 40–50 cm diameter; 5–12 L reservoir | Provides greater root volume without relying on daily watering |
| Hot, windy balcony | Heavy UV-resistant planter with a covered reservoir | Minimum 30 L soil volume; 5 L or more of reserve water | Reduces evaporation and is less likely to tip |
| Frequent travelers | Large reservoir planter with water-level indicator | 8–15 L reservoir; removable fill tube | Allows clear checking and longer intervals between refills |
How self-watering planters work
Most self-watering planters separate the plant’s growing medium from a water reservoir. A perforated platform, wicking column, or fabric wick carries moisture upward through capillary action. The roots receive a more consistent supply than they would from occasional surface watering, while the upper soil can remain less saturated.
This does not make a planter completely automatic. You still need to fill the reservoir, check that the wicking system is working, and adapt watering to temperature, plant size, and season. A self-watering planter can also keep soil too wet if it is used for a drought-tolerant plant or placed in a cool, poorly ventilated position.
Reservoir capacity: choose by interval, not by the biggest number
Reservoir capacity determines how long the planter may go between refills, but the stated capacity is not the same as usable capacity. A tank labeled 5 liters may hold less water below its maximum fill line, and a large plant may consume that water quickly in direct sun.
A practical estimate is:
Refill interval in days = usable reservoir capacity ÷ estimated daily water use.
For example, a planter has a usable 4-liter reservoir. A mature patio pepper in warm, sunny weather may use approximately 0.5 to 0.8 liters per day, depending on wind and plant size. At 0.6 liters per day, the calculation is 4 ÷ 0.6, or about 6.7 days. In a cooler week, the same reservoir could last longer; during a heatwave, it may last only four or five days.
For small herbs, a 1-liter reservoir is often more practical than a 10-liter tank because it is easier to clean and less likely to keep the roots constantly wet. For large planters, prioritize soil volume as well as reservoir capacity. A huge tank does not compensate for a cramped root zone.
Overflow protection is essential outdoors
Outdoor planters need a defined overflow route. Without one, rain can fill the reservoir and raise the water level into the root zone, producing waterlogged compost and oxygen-starved roots.
- Overflow hole: A port positioned at the maximum reservoir level allows excess water to escape. It should be visible and kept clear.
- Overflow pipe: A vertical tube can make the maximum water level easier to understand and may direct excess water away from the planter base.
- Open drainage gap: Some basic designs use a gap beneath the insert. These can work, but they may drain onto a balcony or patio surface.
- No overflow protection: Avoid these outdoors unless the planter is kept under cover and monitored closely.
Position the overflow on the side facing a safe drainage area. On a balcony, check building rules and protect the surface below from staining or constant runoff. Never block an overflow hole to increase capacity; that changes the planter’s intended water level.
Planter materials compared
| Material | Typical strengths | Ownership drawbacks | Best use |
|---|---|---|---|
| Plastic or resin | Light, affordable, corrosion-resistant, easy to clean | Can fade, become brittle, or blow over when empty | Balconies, seasonal plants, and larger movable containers |
| Polypropylene | Lightweight, commonly molded with separate reservoir parts | Thin components and clips may wear with repeated handling | Budget indoor or sheltered outdoor planters |
| Fiberglass or composite | Good appearance-to-weight ratio and often UV-resistant | Usually costs more; scratches can expose the finish | Permanent patio displays where appearance matters |
| Glazed ceramic | Heavy, stable, decorative, and resistant to surface staining | Breakable and difficult to move; hidden inserts may be smaller | Protected patios and entryways |
| Metal | Strong and visually distinctive | Can heat roots, corrode, or add substantial weight | Partly shaded locations with a corrosion-resistant liner |
For exposed patios, UV-resistant resin or composite is usually the sensible compromise. Dark metal and dark plastic can become hot in direct afternoon sun, increasing water consumption and stressing shallow roots. Heavy ceramic is stable in wind, but confirm the filled weight before placing it on a balcony.
Drainage control: the feature that prevents overwatering
Look for a planter with a distinct root chamber above the reservoir, rather than a pot that simply has a saucer underneath. The root chamber should have enough aeration space and a drainage path for excess water. A fill tube should end in the reservoir, not directly in the soil.
Use a free-draining potting mix formulated for containers. Dense garden soil can clog the wicking system and reduce air pockets. A typical mix for foliage plants may combine potting mix with perlite or another aerating amendment. Follow the plant’s requirements: moisture-loving plants tolerate more consistent moisture, while succulents, cacti, rosemary, and lavender generally need a more freely draining setup and a longer dry period.
Do not add a thick layer of gravel to the bottom of the root chamber as a substitute for drainage. It takes away usable soil volume and does not correct a poorly designed water path. If a plant needs a drier cycle, use a planter with an adjustable wick, a bypass setting, or a removable reservoir insert.
Watering intervals by plant type
| Plant group | Typical interval in mild weather | Likely interval in hot sun | Important adjustment |
|---|---|---|---|
| Basil, mint, parsley | 2–5 days | 1–3 days | Keep evenly moist, but provide airflow |
| Petunias, impatiens, marigolds | 3–7 days | 2–4 days | Flowering plants consume more when actively blooming |
| Tomatoes and peppers | 2–5 days | 1–3 days | Use a large root chamber and support the plant |
| Ferns and moisture-tolerant foliage | 5–10 days | 3–7 days | Humidity and shade can greatly extend the interval |
| Succulents and cacti | 10–21 days or longer | 7–14 days | Allow the growing medium to dry substantially |
| Rosemary and lavender | 7–14 days | 5–10 days | Avoid a constantly full reservoir and stagnant roots |
These intervals are starting points, not promises. Check the soil, inspect the plant, and monitor the reservoir indicator. Newly planted specimens often use less water until roots reach the wicking zone, while mature plants may empty a tank much faster.
Setup and maintenance that extend planter life
- Inspect the reservoir first. Confirm that the fill tube, float, overflow, and wick are present and unobstructed.
- Pre-moisten the potting mix from above. A dry mix may initially repel water instead of wicking it upward.
- Leave an air gap. Fill only to the marked maximum level so the root chamber is not submerged.
- Wait before adding fertilizer. Once the plant is established, use a container-plant fertilizer at the label rate. Concentrated fertilizer can accumulate in a reservoir.
- Flush periodically. Every few months, empty the reservoir and water through the soil from above until water exits through the drainage path. This helps reduce mineral buildup.
- Clean between plantings. Remove roots and sludge, wash removable parts, and clear the overflow and wick channels.
The parts most likely to wear first are fabric wicks, small float indicators, seals, clips, and thin plastic fill tubes. Keep replacement wicks compatible with the planter rather than improvising a material that may restrict flow. In winter, empty outdoor planters in freezing climates because trapped water can expand and crack rigid inserts or ceramic shells.
Final buying checklist
- Choose a reservoir sized for your plant’s likely daily water use.
- Prefer a visible maximum-fill mark and a functioning overflow outlet.
- Match the material to sun, wind, weight limits, and how often you will move the planter.
- Confirm that the wick or capillary column is replaceable or accessible for cleaning.
- Use a root chamber large enough for the mature plant, not just the starter plant.
- Avoid self-watering designs that have no way to drain excess rain.
The best self watering planters make watering more consistent, but they do not remove the need to understand the plant. Start with a moderate reservoir, observe how quickly it empties over two or three weeks, and then adjust the planter position, soil mix, or watering routine to suit the actual conditions on your patio.



Write Your Review
No reviews yet. Be the first to share your experience!