

Key takeaways
- Place the pit on a level, noncombustible surface such as concrete, brick, or a purpose-made fire-resistant pad. Do not place it directly on wood decking, artificial turf, dry grass, or composite decking unless the manufacturer specifically approves the setup.
- Keep at least 10 feet from buildings, fences, overhead branches, furniture, and stored firewood; local fire codes may require more.
- Check wind before lighting. A spark screen does not make a fire safe in strong or gusty conditions.
- Keep a hose, bucket of water, or charged extinguisher close enough to reach without passing through the fire.
- Never use gasoline, alcohol, or lighter fluid in a wood-burning pit. Use dry kindling and a fire starter intended for solid fuel.
- Allow ashes to cool completely, then transfer them to a lidded metal container placed outdoors on a noncombustible surface. Embers can remain hot for many hours.
The best wood burning fire pits for most patios are a 24- to 30-inch steel bowl with a stable base, a fitted spark screen, and enough airflow to burn seasoned wood cleanly; choose a smokeless double-wall model if smoke control matters more than a traditional open flame.
Our top picks

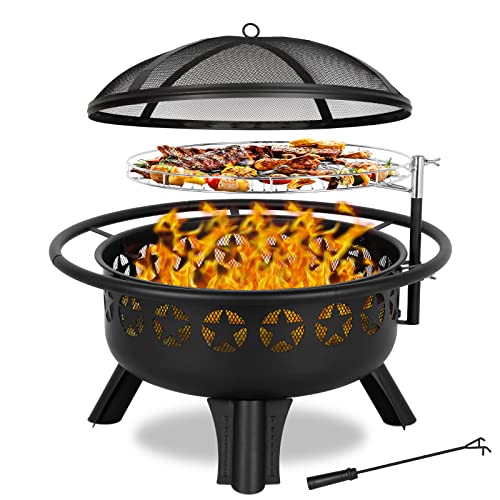

As an Amazon Associate we earn from qualifying purchases at no extra cost to you. Ratings are shown as listed on Amazon.
Best wood burning fire pits by outdoor situation
| Patio situation | Best choice | Useful target specifications | Why it fits |
|---|---|---|---|
| Small patio or occasional use | Portable steel fire pit | 20–24 in. diameter, 25–45 lb, spark screen | Easier to store and less visually dominant |
| Regular family gatherings | Large steel bowl | 28–34 in. diameter, 45–80 lb, deep basin | Holds more wood and provides a wider warming area |
| Lowest visible smoke | Double-wall smokeless steel pit | 20–30 in. diameter, secondary-air holes, removable ash pan | Reburns some smoke when operated with dry wood and adequate airflow |
| Permanent focal point | Heavy cast-iron or thick-gauge steel pit | 28–36 in. diameter, 70–150 lb, weather cover | Stable, substantial, and less likely to shift in wind |
| Moving between deck, yard, and storage | Steel pit with handles or wheels | 22–27 in. diameter, under 55 lb | Practical to relocate without lifting a very heavy bowl |
Our strongest picks by design
Best all-around: a 28- to 30-inch steel bowl with a screen
A conventional steel bowl is the safest recommendation for shoppers who want a familiar fire, straightforward maintenance, and moderate cost. Brands such as Tiki Brand and Sunnydaze Designs offer this general format in multiple sizes, while many unbranded versions use similar construction.
Look for a bowl at least 24 inches across, three or more sturdy legs, drainage holes, and a spark screen that sits securely rather than balancing loosely on the rim. A 28-inch bowl usually gives four to six adults a comfortable arrangement without consuming the entire patio. Steel heats and cools relatively quickly, so it is easier to handle after the fire is fully out than a heavy cast-iron model.
Best for smoke reduction: Solo Stove Bonfire 2.0 or a similar double-wall pit
The Solo Stove Bonfire 2.0 is a well-known example of a stainless-steel, double-wall fire pit with secondary combustion. Air enters through lower vents, warms between the walls, and exits near the top to help burn smoke particles. This can make a meaningful difference after the fire is hot, although it does not make the fire smokeless.
Its roughly 19.5-inch diameter is portable enough for many patios, but the smaller opening limits log length and seating heat compared with a 28- or 30-inch bowl. A removable ash pan also improves cleanup. Choose this style if smoke drifting toward neighbors is your primary concern and you are willing to split wood small enough for the burn chamber.
Best heavy-duty option: Breeo X Series
The Breeo X Series uses thick steel and a robust ring-style construction intended for frequent outdoor use. It is available in several diameters, including sizes suited to larger seating areas. The added steel improves stability and longevity, but it also raises the weight and purchase price. Some configurations can exceed 60 lb, and larger versions are substantially heavier.
This is a better fit for a dedicated fire area than for a compact balcony or patio that must be rearranged regularly. It is also worth checking the exact configuration: a cooking ring, lid, spark screen, or base may be an accessory rather than part of the standard package.
Best traditional material: cast iron
Cast iron holds heat longer than thin steel and has a reassuringly solid feel. It is particularly attractive for a fixed seating area where the pit will remain in one position. The tradeoff is weight: a cast-iron bowl can weigh roughly twice as much as a similarly sized thin steel bowl.
Cast iron also needs more careful moisture management. Surface rust can develop quickly if the finish is damaged or rainwater collects inside. Dry the bowl after wet weather, avoid leaving ash in it, and use a breathable cover rather than trapping condensation under an airtight one.
Steel versus cast iron: the head-to-head choice
| Characteristic | Steel | Cast iron |
|---|---|---|
| Typical weight for a 28-inch pit | 35–70 lb | 70–130 lb |
| Heat-up and cool-down | Faster | Slower; retains heat longer |
| Portability | Usually better | Usually poor once assembled |
| Rust risk | Moderate; depends on finish and thickness | Moderate to high if neglected |
| Best use | Regular repositioning and general patio use | Permanent, heavy-duty installations |
For ownership, the thinnest steel usually wears first around the hottest base area, drain holes, and welds. Cast iron can last for years but may crack if struck while hot or exposed to rapid temperature changes. In either material, a cover protects the finish, but it does not replace drainage or drying.
How large should your fire pit be?
Size the pit by both seating and fuel. A 20-inch pit is suitable for two to four people and short fires. A 24- to 28-inch pit is the practical middle ground for four to six people. A 30- to 36-inch pit can serve larger groups, but it consumes more wood, throws more heat, and demands a larger safety zone.
As a rough planning calculation, assume a 28-inch bowl uses two to four split logs per hour, depending on log diameter and how aggressively it is fed. If one bundle contains about eight usable logs and costs $8–$12 locally, a three-hour fire may consume approximately $6–$18 of wood. That estimate excludes kindling and varies considerably with species, moisture, and wind, but it shows why a very large bowl can cost more to operate than its purchase price suggests.
Spark control and smoke reduction are different features
A spark screen is a safety accessory: it helps contain embers and larger sparks, but it can restrict airflow and become extremely hot. Use a screen designed for the specific pit, keep it in place when wind increases, and lift it only with a suitable tool after the fire has cooled.
Smoke reduction comes from combustion design, not from a mesh lid. Double-wall pits can reduce visible smoke once a hot coal bed has formed, but startup, damp wood, overloaded fuel, and low airflow will still produce smoke. Burn dry, split hardwood rather than freshly cut branches, construction scraps, painted wood, or treated lumber.
Patio safety: the measurements that matter
- Place the pit on a level, noncombustible surface such as concrete, brick, or a purpose-made fire-resistant pad. Do not place it directly on wood decking, artificial turf, dry grass, or composite decking unless the manufacturer specifically approves the setup.
- Keep at least 10 feet from buildings, fences, overhead branches, furniture, and stored firewood; local fire codes may require more.
- Check wind before lighting. A spark screen does not make a fire safe in strong or gusty conditions.
- Keep a hose, bucket of water, or charged extinguisher close enough to reach without passing through the fire.
- Never use gasoline, alcohol, or lighter fluid in a wood-burning pit. Use dry kindling and a fire starter intended for solid fuel.
- Allow ashes to cool completely, then transfer them to a lidded metal container placed outdoors on a noncombustible surface. Embers can remain hot for many hours.
A practical setup and maintenance routine
- Inspect the bowl, legs, welds, screen, and drainage holes before every fire. Stop using the pit if a leg is loose or the base is distorted.
- Clear old ash so air can reach the fire. In a smokeless model, blocked lower vents can undermine the secondary burn.
- Build a small, loose stack of kindling over two or three small splits. Overfilling at startup creates unnecessary smoke.
- Add larger logs gradually and keep them below the rim. Logs projecting over the edge increase the chance of rolling embers.
- After the fire is out, remove ash only when it is cold. Emptying ash regularly also prevents moisture from combining with residue and accelerating corrosion.
- Dry the pit, cover it while cool, and store removable screens and accessories where rain cannot pool on them.
Bottom line
Choose a 24- to 30-inch steel bowl with a fitted spark screen for the best balance of cost, capacity, and portability. Choose a Solo Stove Bonfire 2.0 or comparable double-wall model when reducing visible smoke is the priority. Choose a Breeo X Series or a heavy cast-iron pit for a permanent, frequently used fire area. Whatever the design, dry fuel, generous clearances, stable placement, and disciplined ash handling matter more to patio safety than a premium finish or a large flame.


Write Your Review
No reviews yet. Be the first to share your experience!