

Key takeaways
- Small house: use at least one roof vent plus an opening door.
- Medium house: aim for two roof vents or roughly 10% to 15% of floor area in adjustable ventilation.
- Hot climates: add an exhaust fan, circulation fan, and shade cloth rather than relying on a door alone.
- Cool climates: use automatic wax-cylinder vent openers so overheating is controlled even when nobody is home.
The best backyard greenhouses are the ones whose size, glazing, ventilation, foundation, and structural strength match your local weather and the amount of time you can spend maintaining them—not simply the largest model that fits your yard.
Our top picks
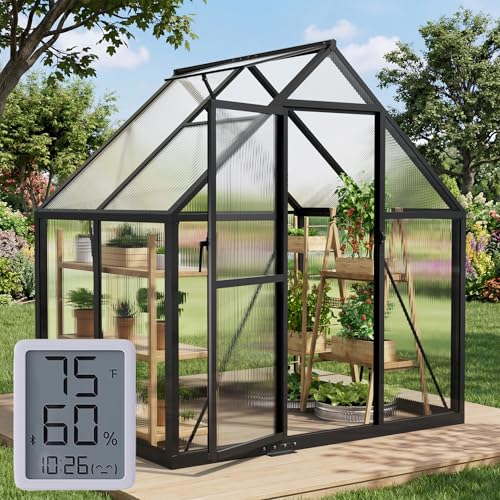


As an Amazon Associate we earn from qualifying purchases at no extra cost to you. Ratings are shown as listed on Amazon.
Quick picks by backyard situation
| Backyard condition | Best greenhouse type | Useful target specifications | Why it fits |
|---|---|---|---|
| Small patio, balcony, or beginner setup | Compact lean-to or walk-in polycarbonate house | 4 × 6 ft to 6 × 8 ft; twin-wall panels; one roof vent | Uses little space and is manageable without becoming a daily chore |
| Typical suburban yard | Freestanding aluminum greenhouse | 6 × 8 ft to 8 × 12 ft; 4 mm to 10 mm polycarbonate; automatic vents | Enough room for shelves, paths, seed starting, and summer ventilation |
| Cold, windy, or snowy climate | Reinforced polycarbonate greenhouse | 10 mm multiwall panels; anchored base; roof pitch suited to snow shedding | Better insulation and impact resistance than thin glass or single-layer film |
| Warm, sunny climate | Aluminum or steel house with adjustable shade and abundant ventilation | Two or more roof vents; louvered side vents; shade cloth; automatic vent openers | Prevents excessive heat, which can damage plants faster than cool nights |
| Serious year-round growing | Insulated greenhouse with rigid foundation | 8 × 12 ft or larger; 10 mm to 16 mm multiwall panels; heater and circulation fans | Provides space for thermal zoning, equipment, and winter access |
How the main greenhouse materials compare
Multiwall polycarbonate: the practical all-rounder
Multiwall polycarbonate is usually the safest choice for a backyard greenhouse. Its internal air channels slow heat loss, while the panels tolerate accidental impacts better than ordinary horticultural glass. Twin-wall panels are commonly 4 mm to 6 mm thick; 10 mm and 16 mm panels provide greater insulation for colder regions.
The trade-offs are reduced visual clarity, gradual weathering, and the need to seal panel edges correctly. Dust, algae, and insects can enter open channels if the supplied end tape and profiles are installed poorly. Look for panels with a stated ultraviolet-resistant outer face, and install that face outward.
Horticultural glass: bright and attractive, but less forgiving
Glass transmits abundant light and does not become cloudy in the same way as some plastics. It also gives a traditional greenhouse a permanent appearance. However, glass panels are heavier, can break from impact, and transfer heat quickly. A glass house normally needs a more substantial base and careful anchoring.
Tempered safety glass is preferable where children, pets, hail, or frequent yard activity are concerns. If a listing only says “glass” without identifying the type, ask before buying. Single-pane glass may work in a mild climate for seasonal growing, but it is a poor choice for inexpensive year-round heating.
Polyethylene film: low cost and easy to expand
Film-covered tunnel houses offer the most growing area per dollar. They are useful for vegetable production and can be repaired or recovered more easily than rigid panels. Their weak points are wind damage, shorter cover life, condensation, and limited insulation.
Choose greenhouse-grade, ultraviolet-treated film rather than general-purpose plastic sheeting. Expect the cover to be a consumable: depending on sunlight, wind, and handling, it may need replacement after several seasons. A film house is attractive when budget and growing area matter more than a polished permanent structure.
Size the greenhouse around usable growing space
Greenhouse dimensions describe the outside footprint, not the area available for plants. Shelves, pots, water cans, heater clearances, and a walking path quickly consume floor space. A 6 × 8 ft greenhouse has 48 square feet outside, but after a central 2-ft path and narrow side benches, the productive area may be closer to 20 to 28 square feet.
As a planning rule, reserve at least 30 inches for a comfortable main walkway and 18 to 24 inches for fixed benches. A 4 × 6 ft structure is suitable for seedlings, herbs, and a few compact crops. An 8 × 12 ft greenhouse is more flexible because it can hold benches on both sides while preserving a path. If you expect to grow tomatoes or cucumbers vertically, allow roughly 7 to 8 ft of interior height at the ridge.
A simple sizing calculation
Suppose you want two 2-ft-deep benches along the sides of an 8-ft-wide greenhouse. The benches use 4 ft of width, leaving 4 ft for a path and plant access. In a 6-ft-wide greenhouse, the same benches leave only 2 ft, making watering and harvesting awkward. In that situation, a 6 × 8 ft house with one bench may be more usable than a cramped 8 × 6 ft layout.
Ventilation matters more than most buyers expect
Sunlight can push a closed greenhouse above 100°F (38°C) even when outdoor air feels comfortable. Ventilation should therefore be planned before buying shelves or heaters. Roof vents release rising hot air; low side vents or a louvered door supply replacement air.
- Small house: use at least one roof vent plus an opening door.
- Medium house: aim for two roof vents or roughly 10% to 15% of floor area in adjustable ventilation.
- Hot climates: add an exhaust fan, circulation fan, and shade cloth rather than relying on a door alone.
- Cool climates: use automatic wax-cylinder vent openers so overheating is controlled even when nobody is home.
Fans move air but do not replace vents. A fan in a sealed greenhouse simply recirculates hot air. Avoid placing the structure where a wall, fence, or dense hedge blocks the prevailing breeze unless mechanical ventilation is part of the plan.
Foundation and anchoring: the decision that prevents expensive damage
A greenhouse can be light enough to assemble easily but still have enough wind area to behave like a sail. Level, anchored support is essential. Options include a pressure-treated timber perimeter, poured concrete, concrete pavers over compacted aggregate, or a manufacturer’s metal base anchored to suitable ground.
For a small rigid-panel greenhouse in a sheltered yard, a level perimeter frame with ground anchors may be adequate. In exposed locations, use deeper anchors or a concrete foundation designed for local soil and wind conditions. Do not place the greenhouse directly on soft lawn or loose soil: settlement twists the frame, stresses panels, and prevents doors from sliding properly.
Before purchasing, check local rules for setbacks, snow load, wind exposure, and permanent accessory structures. A greenhouse attached to a house may also require different permits and weather-sealing details than a freestanding model.
Climate durability and winter growing
For snowy regions, prioritize a sloped roof, a published snow-load rating, strong connectors, and an anchoring system. Brush heavy snow from the roof before it compacts, but use a soft tool that will not scratch polycarbonate. A greenhouse rated for a particular snow load is not automatically safe if snow drifts against one side or the foundation shifts.
For windy regions, the frame-to-foundation connection matters as much as the panel thickness. Aluminum frames resist corrosion and are common on rigid-panel houses; galvanized steel frames can provide greater stiffness but may be heavier and more vulnerable to coating damage if scratched. Inspect fasteners annually and replace missing clips immediately.
In freezing weather, an unheated greenhouse protects plants from wind and precipitation but may still reach outdoor temperatures overnight. Year-round production normally requires insulation, a correctly sized heater, a thermostat, and a safe electrical installation. The cost of heating a poorly sealed greenhouse can exceed the purchase-price difference between thin and insulated glazing.
Assembly demands and ownership realities
Rigid greenhouse kits are rarely difficult because of one complicated step; they are difficult because there are many small parts and the frame must remain square. Two adults are strongly recommended for larger models. Allow a full day for a compact kit and a weekend for a medium greenhouse, excluding foundation work.
- Prepare the site first. Confirm level, drainage, sun exposure, and access for carrying long panels.
- Build and square the base. Measure both diagonals; equal diagonals indicate a square rectangle.
- Install the frame loosely. Tightening every bolt before the frame is aligned can make later panel fitting difficult.
- Fit glazing and seals carefully. Keep protective films on until panels are positioned, but remove them before clips and edges become inaccessible.
- Anchor before adding benches. A finished interior can hide an inadequately secured structure.
- Test doors and vents. They should move freely without forcing the frame.
The parts that usually wear first are door rollers, vent openers, panel clips, weather seals, film covers, and inexpensive shelving. Keep spare clips and compatible glazing tape on hand. Wash rigid panels with mild soap and water; abrasive cleaners can scratch them and reduce light transmission. Clear roof gutters, remove dead leaves around the base, lubricate moving hardware where the manufacturer permits it, and inspect after major storms.
What to expect to spend
General market ranges in 2026 are roughly $150 to $500 for small film or basic compact kits, $500 to $2,000 for many 6 × 8 ft to 8 × 12 ft polycarbonate houses, and $2,000 to well above $10,000 for large, heavily framed, insulated, or custom glass structures. Foundation preparation, shelving, fans, heaters, shade cloth, delivery, and installation can add substantially to the kit price.
Brands such as Palram–Canopia, Rion, Vitavia, Juliana, and Hartley Botanic cover different points in the rigid-panel and glass greenhouse market. Compare their foundation requirements, replacement-panel availability, ventilation hardware, structural ratings, and warranty terms rather than treating brand name alone as a durability guarantee.
Final buying checklist
- Measure the site and leave working clearance around the exterior.
- Choose glazing thickness for your climate, not just your budget.
- Verify wind and snow ratings for the assembled, anchored structure.
- Plan low and high ventilation, including automatic controls if you are away during the day.
- Budget for a level foundation, benches, shade, fans, and winter heating if needed.
- Confirm replacement-panel, film, clip, and door-hardware availability.
- Select a size that leaves room for paths and plant growth instead of filling every inch immediately.
For most backyards, the strongest balance is a 6 × 8 ft or 8 × 12 ft aluminum greenhouse with 6 mm to 10 mm multiwall polycarbonate, a properly anchored base, adjustable roof vents, and enough interior height for the crops you actually plan to grow. Smaller structures suit occasional seed starting; larger insulated houses make year-round growing possible but demand a foundation, ventilation plan, and operating budget to match.

Write Your Review
No reviews yet. Be the first to share your experience!